Removal-Bumpers
Front Bumpers
“secret is having the right ratchet….only place I have been able to find these is Sears….it needs to be short and a flat profile…..there is one very difficult bolt to access on each side…use a 12 or 13 mm socket(forget which at the moment)also need an open end wrench, work the wrench and socket against each other….four bolts per bumper is all there is…then unplug the light harness…very simple concept, just a bit*h to get to the 2 bolts….now, reinstalling them is another story….most difficult to get to the same two troublesome bolts…..have seen where some have taken off the side panels etc…it isn’t necessary, but might make access easier….I just didn’t want to get into the shims, alignment of panels”
_______________________________________________________________________________
by Koastal Cat-POA
Disconnect turn signal harness first.
2. Place some type of support under the bumper so they do not drop once the bolts are removed.
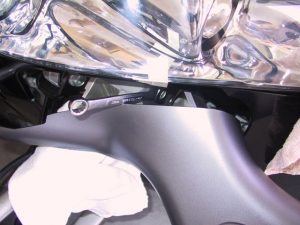
3. For me there was no need to remove any body parts i.e. Grills, Light Housing etc… blind access to the bolts was achieved with the right tool.
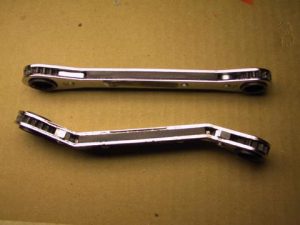
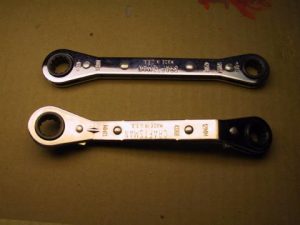
Here is the key. You will need a very short handle 13mm box wrench (aka a stubby wrench) to remove the bolts furthest form the battery. See attached picture for wrenches I used. The problem is clearance from the frame and side panel.
One warning when using a short handle wrench, you lose a lot of leverage, thus you have to really push or pull hard to generate enough torque to break the bolt free. Don’t slip or your knuckles will feel the pain. I was only able to make very small turns but with patients I was able to achieve the goal.
Tools –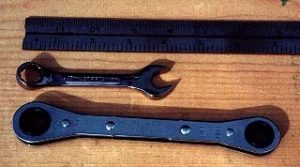
_______________________________________________________________________________
by pumpkin – POA
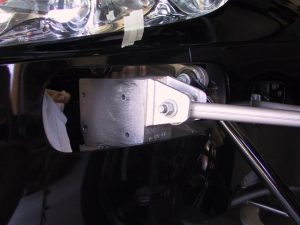
There are 4 13 mm bolts that hold each bumper and one electrical connector to the lights. The bolt heads face forward and the nuts are on the back side of the frame. The nuts also have tabs welded to them so they will not rotate, i.e. you only need to turn the bolt head (this makes life a lot easier since you need only get in there with one tool).
Undo the electrical connectors so you won’t forget later.
Use a 13 mm socket wrench to get at the bolt heads. Two of the bolts are easy to get at and you can easily see them with the hood open. Go ahead and do those first, so you’ll feel like you are making progress Another one is a little tougher, but doable. Remove this one next, so you’ll have the mistaken impression that you are 3/4 done. The fourth bolt is wedged behind the aluminum frame for the bumpers and a real pain in the *. I found it easiest to remove the first three and then you can rotate the bumper slightly for better access. I also used a 1/4″ drive ratchet, because it was smaller and easier to rotate (actually I used a 1/4″ drive air ratchet, but hand tools should work). You may have to break the bolts loose with a combination wrench or 3/8″ drive to get enough leverage.
It took me about 45 minutes to get one side off and then 5 minutes for the other. Most of the time was jockeying around, selecting the right tools, and hurling obscenities over that 4th bolt.
Tools-Part numbers are 43368 (offset), 42173 (straight)
_________________________________________________________________________
Rear Bumpers
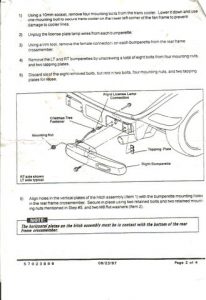
There are connectors for the backup lights. 4 bolts each bumper. Alert: The manual picture shows 2 outer bolts bolt into a tapping plate and the inside bolts you will see a nut, the bolt is removed from the back. Bolts looks different for inside and outside so keep them together for remount.