Window Regulator Fix
Window Regulator Fix by Kraut
1. How do you know when the window regulator is broken? It may be broken and still seem to work, as mine did.
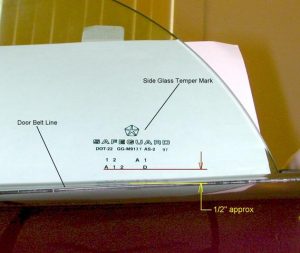
Answer: If it doesn’t sound quite right, or like other power windows you’ve operated. It may make a very subtle ratcheting type noise. Also, If it doesn’t go up all the way with the top up. If you close the window with the top up, it should go to the same height as with the top down. You can see this by checking the position of temper mark on the glass near the rear of the window. See picture:
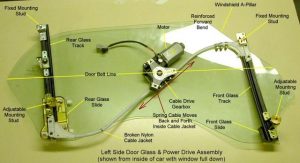
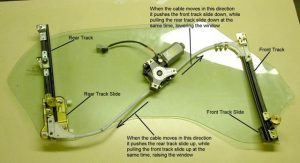
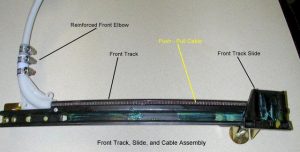
2. What does the regulator look like, and how does it work?
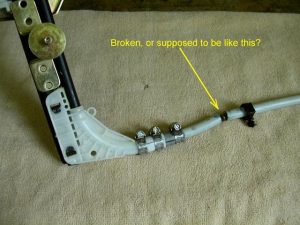
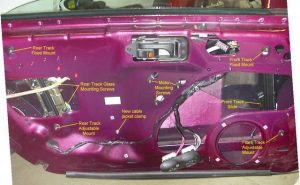
Answer: The window regulator is a cable operated mechanism. In this particular case, it has a couple of inherent flaws, which make susceptible to failure. The cable drive is subjected to severe bending stresses and constant flexing, causing the cable jacket to eventually break. See picture:
3. How can this be repaired?
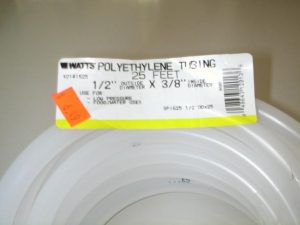
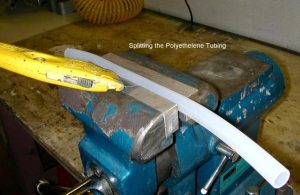
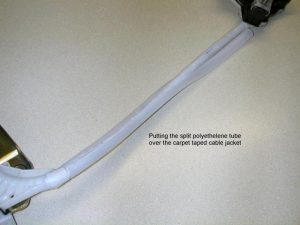
Answer: Here’s what I did. The cable jacket needs to be reinforced to prevent it from breaking again (at least not as quickly). One way to do this is to thicken the walls of the cable jacket. Start by splitting a bigger tube to fit over the existing cable jacket:
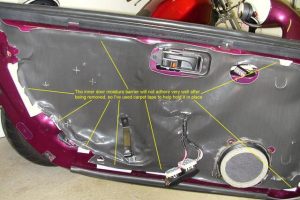
The tube now needs to be secured around the existing cable jacket by bonding and clamping it in place. This will both hold the broken cable jacket together and prevent it from ever being stretched or broken again. I used a very strong double sided carpet tape to do the bonding.
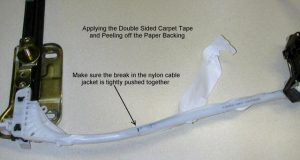
I then put the new split tube in place over the existing cable jacket. This is a tricky operation, since the split tube is difficult to hold open while placing over the very sticky carpet tape.
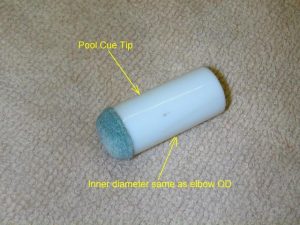
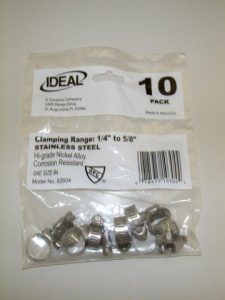
Next step is to add additional reinforcement around the broken and weak areas. I used some pool cue tips I had lying around. Then I clamped it all together with hose clamps. This makes a solid and permanent bond between the inner and new outer cable jacket. It is now a little more difficult to bend for reinsertion into the door, but well worth the effort.

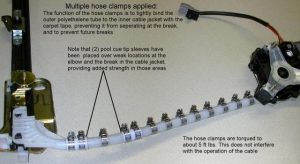
Finally, the cable drive assembly must be reinstalled into the door. A new cable clamp is required to accommodate the larger diameter of the cable jacket. This clamp also does a much better job of securing the cable and all but eliminating the excess flexing.

Here are a couple of notes I forgot:
1. Regrease the cable and slide tracks while you have them out, as Catfish mentioned (I did).
2. Replace the (4) X-Mas tree clips used to hold the inner door panel in place. They don’t work very well for a second application.
3. Adjust the window positions with the adjustment screws to align with the seals on the convertible top, giving even and secure compression along the entire length of the seals.
4. And most important, check your windows to see if the temper mark comes up to the same height with the top up, while the door is open and then closed.
You won’t believe how much this improves the operation of the windows.
Another note: I mentioned in my prior post on this subject, that I wasn’t sure if the break in my cable jackets were fractures or designed in features. I’m still not sure. The breaks in my cable jackets were in my opinion too clean to be stress related fractures. They were perfectly straight and smooth on both cables, as well as being in the same location. I think this may be an attempt at some sort of safety feature, reducing the risk of pinching as the window goes up. Unfortunately, it is also a design feature which almost guarantees poor function of the windows going to the closed position.