Replacing Speakers
By Midnight Son POA
Since most people on the board seem to agree that these are overall the best and easiest replacements for the door speakers, I popped for ‘em – right after ZZ Top blew one of mine to smithereens last weekend. Just finished the job, and I can report that there are a couple of things to watch out for on this latest version of the Kappa speakers due to changes in the design. (If you think this is useful, I would suggest the administrators append this to the thread with Pumpkin’s original instructions to make it easy to find.) NOTE: My Kat’s a ’99; not sure all years are identical in this area.
First of all, if you can’t find the hardware (very small bag of clips and screws), don’t panic like I did; look at the back of both speakers – mine was actually inside the back of a speaker, held firmly in place by the speaker magnet.
Second, do not throw out the box the speakers came in; you will need it (see below).
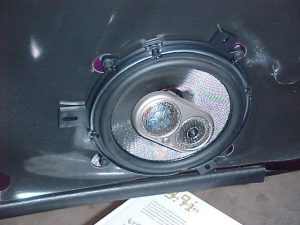
The kit comes with two kinds of adapters, metal and plastic; you will use the plastic one. (Kappa 63.9i’s are 6” speakers; the OEMs were 6-1/2” so the hole in the door panel is too big to mount the new ones directly.)
I recommend mounting the speakers to the adapters first, because the tiny screws will drive you nuts if you do this on the door. Note: Check the position of the large square tabs on the plastic adapter; hold the speaker in the orientation you want it to be in the door and make sure none of the three tabs points straight down because it will interfere with the bottom of the door panel when you try to re-install it.
The crossover has been redesigned from the way in appears in Pumpkin’s directions; the old one was apparently able to be disconnected at both ends, but the new one is permanently wired to the speaker basket. This makes it a little trickier to install because you have to connect the relatively short wires from the door to it and then mount it securely inside the door while the speaker is closely tied to it with its own wire. (You could cut and later re-splice the wires, but remember every additional splice is a potential bad connection and/or loss of signal.)
New crossover (permanently attached to speaker with 5” long wire)
Here’s how I did it:
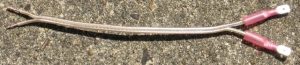
First, cut the wires as close as possible behind the OEM connector so you save as much length as possible. Strip them carefully about ¼”. Remember, connection is everything (think about the “monster” cables they always want you to use in new installations compared to these puny things), so I recommend also tinning the ends with solder. The new crossover has screw terminals which simply bottom out against the wires when they are inserted into a barrel. I wasn’t crazy about this arrangement, so I took the extra step of installing crimp terminals that get pinned securely under the screw heads; simply a more reliable connection.
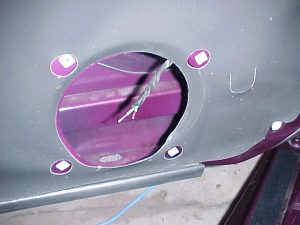
Speaker leads after cutting off OEM connector and stripping
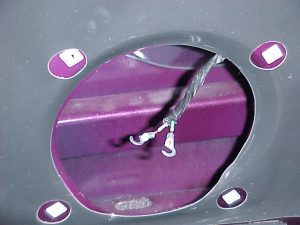
Speaker leads with crimp terminals installed (optional)
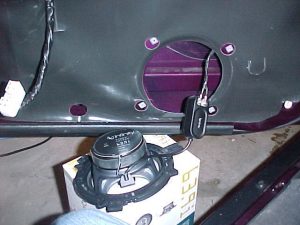
Leads connected to crossover; speaker supported on Infinity carton
Now you have to mount the crossover inside the door, complicated by the fact that the (heavy) speaker is already tied to it by a short wire. I looked around for something just the right height to support the weight of the speaker while I was trying to secure the crossover to the brace inside the door; turns out the Infinity box when stood on end is perfect. (The new crossover box has a built-in slot and channel to accommodate a cable tie, which at least makes this part a little easier.)

Crossover strapped to door brace
Once you’ve got the crossover strapped to the door brace, cut the excess strap as close as possible, check to make sure the back of the speaker does not touch the crossover, and install the speaker using the original OEM screws. Now power up and test it. The speaker has a small pushbutton which seems to turn the tweeter and/or midrange on or off; it’s a good idea to determine your preference on this before re-installing the door panel, although as someone said you can probably actually do this by inserting a pin through the speaker grill later.
Done! (Note orientation of adapter – large tab must not point straight down)
Reconnect the window/door lock and mirror connectors to the door panel, hang the panel loosely on the door, and test everything. Finally, have fun trying to line up the plastic clips along the bottom and rear of the door panel with their holes so you can tap them into place (I had to get underneath with a crawler), re-install the two screws at the front of the panel and the one in the finger pocket, slide the door handle bezel back into place (push towards front of car) and you’re done.
Hopefully what I learned will help someone avoid some of the frustrations I had. First side took me about 2-1/2 hours, other side about half that. I’m hoping my write-up will save somebody else the extra time.
_____________________________________________________________________________________________________________
I made a short 6″ or 9″ pigtail with male crimp terminals on one end that plug right into the OEM connector.
I used simple 18 gauge speaker wire from radio shack.
I should have also used female crimp terminals as you did for the crossover end as well. I screwed down on the wire ends at the crossover.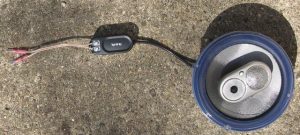
I also mounted the crossover on the underside of the brace to keep it away from the speaker. I had to return the 9″ ties and get the next size up, 14 1/2″ ties. It was a little hard using the 9″ ties. (Extra was cut off.)

If you turn the adapter 90 degrees clockwise from your location, putting the longest tab straight up, the other tabs will have more door clearance as follows.

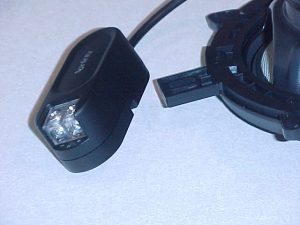
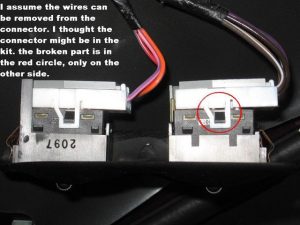
I also recommend removing the entire window/door lock switch as opposed to unplugging it. It’s much easier and can save possibly damaging the connector. To do this, (after the door panel is removed) use a screwdriver to push in and up on the tab at the end of the switch plate (underside). Use caution not to let the screwdriver slide off the tab and into the connector. There is one on each end. Once you have one done, pushing it far enough up thru the door panel, you can just pry/pop it up thru the opening and pull it thru, then turn it sideways, and push it back down thru the opening leaving it to hang free. Install in reverse. (You can see the tab in the above picture, as well in the one below.) If you do not do this, you chance breaking the hold downs on the connector when unplugging it. Then you will have issues with your windows or door locks not working as it will create a loose connection.
_____________________________________________________________________________________________________
by mojoriser POA
wiring diagram for the amplifier/speakers
Connector 1(Closest to the front of car on old amplifier)
New Amplifier Speaker Outputs
White w/red Stripe —- Left Sub +
White w/Black Stripe — Left Sub –
Tan w/ Violet Stripe — Right Sub +
Tan w/ Black Stripe — Right Sub –
Yellow w/Black Stripe — Left Front Dash +
Yellow w/Red Stripe —- Left Front Dash –
Light Green w/Violet Stripe —— Left Front Door +
Light Green w/Dark Green Stripe — Left Front Door –
White w/Violet Stripe ——- Left Rear Small Speaker +
White w/Dark Green Stripe — Left Rear Small Speaker –
Orange w/Black Stripe — Right Front Dash +
Orange w/Red Stripe — Right Front Dash –
Light Blue w/Violet Stripe —— Right Front Door +
Light Blue w/Dark Green Stripe — Right Front Door –
Tan w/Red Stripe ——— Right Rear Small Speaker +
Tan w/Dark Green Stripe — Right Rear Small Speaker –
Connector 2 (Closest to the rear of car)
New Amplifier Speaker Level Inputs
Dark Green —————- LF +
Brown w/Red Stripe ——- LF –
Violet ——————— RF +
Dark Blue w Red Stripe —- RF –
Brown w/Yellow Stripe ——– LR +
Brown w/ Light Blue Stripe — LR –
Dark Blue w/ White Stripe —– RR +
Dark Blue w/ Orange Stripe —- RR –
On Connector Number 1, connect the remote power on from the new amplifier to the Dark Green w/White Stripe wire.